


Drawing a car, often perceived as complicated, is a rewarding art that captures the beauty and intricacies of automotive design. For automotive enthusiasts, aspiring car designers, and skilled illustrators, perfecting the art of car illustrations can take your passion and creativity to a whole new level. Whether you’re sketching as a hobby, designing for a project, or wanting to showcase your automotive artistry, this comprehensive guide is designed to unlock the secrets of drawing a car, using the focus keyword drawing: burmhcczepe= car.
From understanding car anatomy to adding lifelike details with perspective, light, and shadow, this article covers everything you need for mastering the art of car illustrations. Expect to learn the tools, techniques, and processes used by seasoned illustrators, while also developing your own unique style.
A Brief History of Car Illustrations
The art of illustrating cars has grown alongside the evolution of automobiles themselves. Early automobile sketches, dating back to the late 19th and early 20th centuries, were hand-drawn technical drafts used by engineers. By the mid-20th century, as cars became cultural icons, illustrations transitioned into artistic expressions combining engineering precision with the flair of design. Today, car illustrations span from professional CAD (computer-aided design) renderings to freestyle hand-drawn sketches admired by car enthusiasts and collectors.
Understanding Car Anatomy
Before you put pencil to paper (or stylus to tablet), it’s vital to understand the anatomy of a car. Knowing the basics will help you create accurate and proportionate illustrations.
Key Components to Study:
- Body Framework: Outline the overall structure, considering elements like the hood, roofline, and fenders.
- Wheels and Tires: Tires should not only be proportionate but also positioned correctly for realism.
- Grille and Headlights: Front features add character and are specific to each car model.
- Interior: If your illustration is detailed, add a glimpse of the seats, dashboard, or steering wheel.
- Rear Features: Tail lights and bumpers complete the design’s balance from all angles.
By understanding these aspects, you lay the foundation for an accurate and visually appealing car drawing.
Tools of the Trade
Creating stunning car illustrations requires the right tools, whether you choose traditional hand-drawing methods or modern digital software.
Traditional Materials:
- HB, 2B, and 4B pencils for sketching and shading.
- Fine-tip markers or gel pens for outlining.
- Textured, high-GSM sketch pads that can handle erasures and layering.
Digital Drawing Software:
- Adobe Illustrator for creating vector-based car illustrations.
- Procreate for iPad, perfect for freehand enthusiasts.
- Autodesk SketchBook for professional-grade sketching tools.
By combining traditional methods with modern tools, you’ll have everything you need to master drawing: burmhcczepe= car.
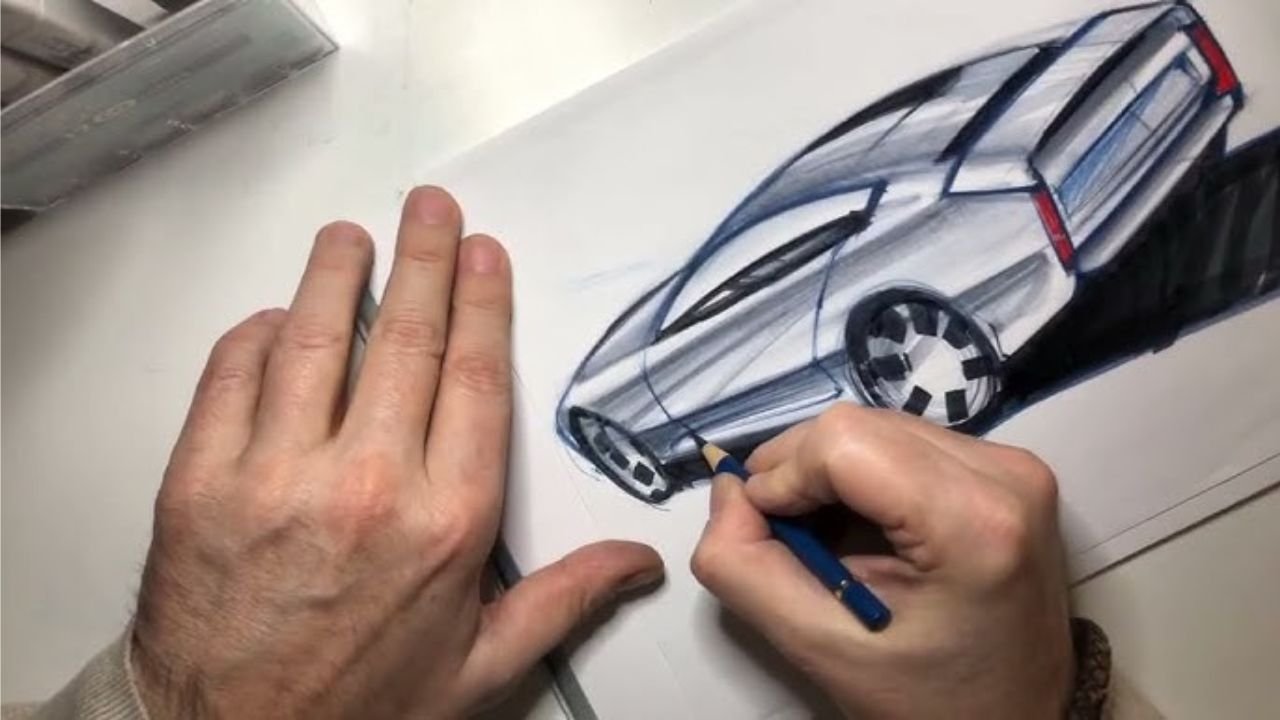
From Concept to Completion: A Step-by-Step Guide to Drawing a Car
Step 1: Start with Basic Shapes
Begin by outlining the car’s body using simple geometric shapes like rectangles, circles, and triangles. These shapes help define the overall proportions.
Step 2: Add the Framework
Focus on the car’s outline by adding defining elements such as the roofline, windows, and body panels.
Step 3: Detail the Exterior
Sketch the car’s headlights, side mirrors, and grille. Pay attention to the car model’s unique features.
Step 4: Refine Proportions
Clean up your lines, ensuring symmetry between the car’s left and right sides. Proportions are critical to a realistic design.
Step 5: Final Shading
Bring the car to life by incorporating gradients, shadows, and reflections. Focus on areas like the windows, headlights, and metallic body panels.
Mastering Perspectives
Drawing cars from different perspectives can be challenging. However, mastering perspectives adds depth and realism to your illustrations.
Popular Views:
- Front View: Showcase the car’s personality through its grille, headlights, and bumper design.
- Side View: Offers a clean, profile view to highlight the car’s proportions and design features.
- Top View: Extremely helpful in understanding roofline and overall symmetry.
- 3D View: Adds dynamism by combining multiple angles, giving depth to your drawing.
Adding Light, Shadow, and Reflections
Shading transforms a flat sketch into a 3-dimensional masterpiece. Focus on lighting sources and how they interact with each surface of the car.
Techniques for Realism:
- Use gradients to add smooth transitions from light to shadow.
- Add highlights on reflective surfaces like windows and metallic panels.
- Practice layering to create depth and texture for tires and grilles.
The Art of Detailing
Small details make a big difference in car illustrations. Whether emphasizing sleek body panels or realistic tire treads, attention to detail enhances the overall aesthetic.
Detailing Tips:
- Use fine lines to show texture and intricacy.
- Experiment with adding insignias or brand logos for a personalized touch.
- Add subtle environmental context (e.g., reflected scenery on metallic panels).
Developing Your Unique Style
While techniques are essential, developing your unique style sets you apart as a car illustrator.
Style-Building Tips:
- Practice regularly to refine your hand movements and proportions.
- Study designs from both historical and modern automobiles for inspiration.
- Experiment with colors and lines to create a signature look.
Sharing and Showcasing Your Work
Once you’ve mastered drawing: burmhcczepe= car, it’s time to share your creations. Building an online presence is key for gaining recognition.
Practical Steps:
- Create a Portfolio: Use platforms like Behance or Dribbble to showcase your work.
- Leverage Social Media: Instagram and Pinterest are great for sharing car illustrations with automotive communities.
- Engage with Communities: Join forums for automotive design to collaborate and gain insights.
You May Also Like: Discovering the Magic of Anime: anime:doqj3fxnevs= Cat
Conclusion
Building your skills in drawing and sharing automotive art can be a rewarding and impactful endeavor. By creating a professional portfolio, utilizing social media platforms, and actively engaging with relevant communities, you can gain recognition and connect with like-minded individuals. The more effort you invest in honing your craft and expanding your network, the more opportunities you’ll unlock in the world of automotive design. Take these steps confidently, and you’ll be on the path to showcasing your talent and achieving your creative goals.
FAQs
What’s the best way to start drawing a car?
Begin with simple geometric shapes and focus on proportions. Gradually add details and refine your sketch for accuracy.
Which software is best for digital car illustrations?
Adobe Illustrator, Procreate, and Autodesk SketchBook are all excellent options offering powerful tools for precision and creativity.
How can I practice mastering car perspectives?
Experiment by sketching cars from various photos or real-life references. Use grid lines to map out angles.
Is prior experience necessary to draw complex cars?
No, but understanding basic drawing principles and practicing consistently helps immensely.
How can I make my drawings more realistic?
Focus on adding light, shadow, and reflections. Use references to understand how lighting interacts with car surfaces.